

CHEESY KIMCHI FRIED RICE KIMBAP
If you’re craving something spicy, cheesy, and totally satisfying, this Cheesy Kimchi Fried Rice Kimbap is about to become your new go-to.
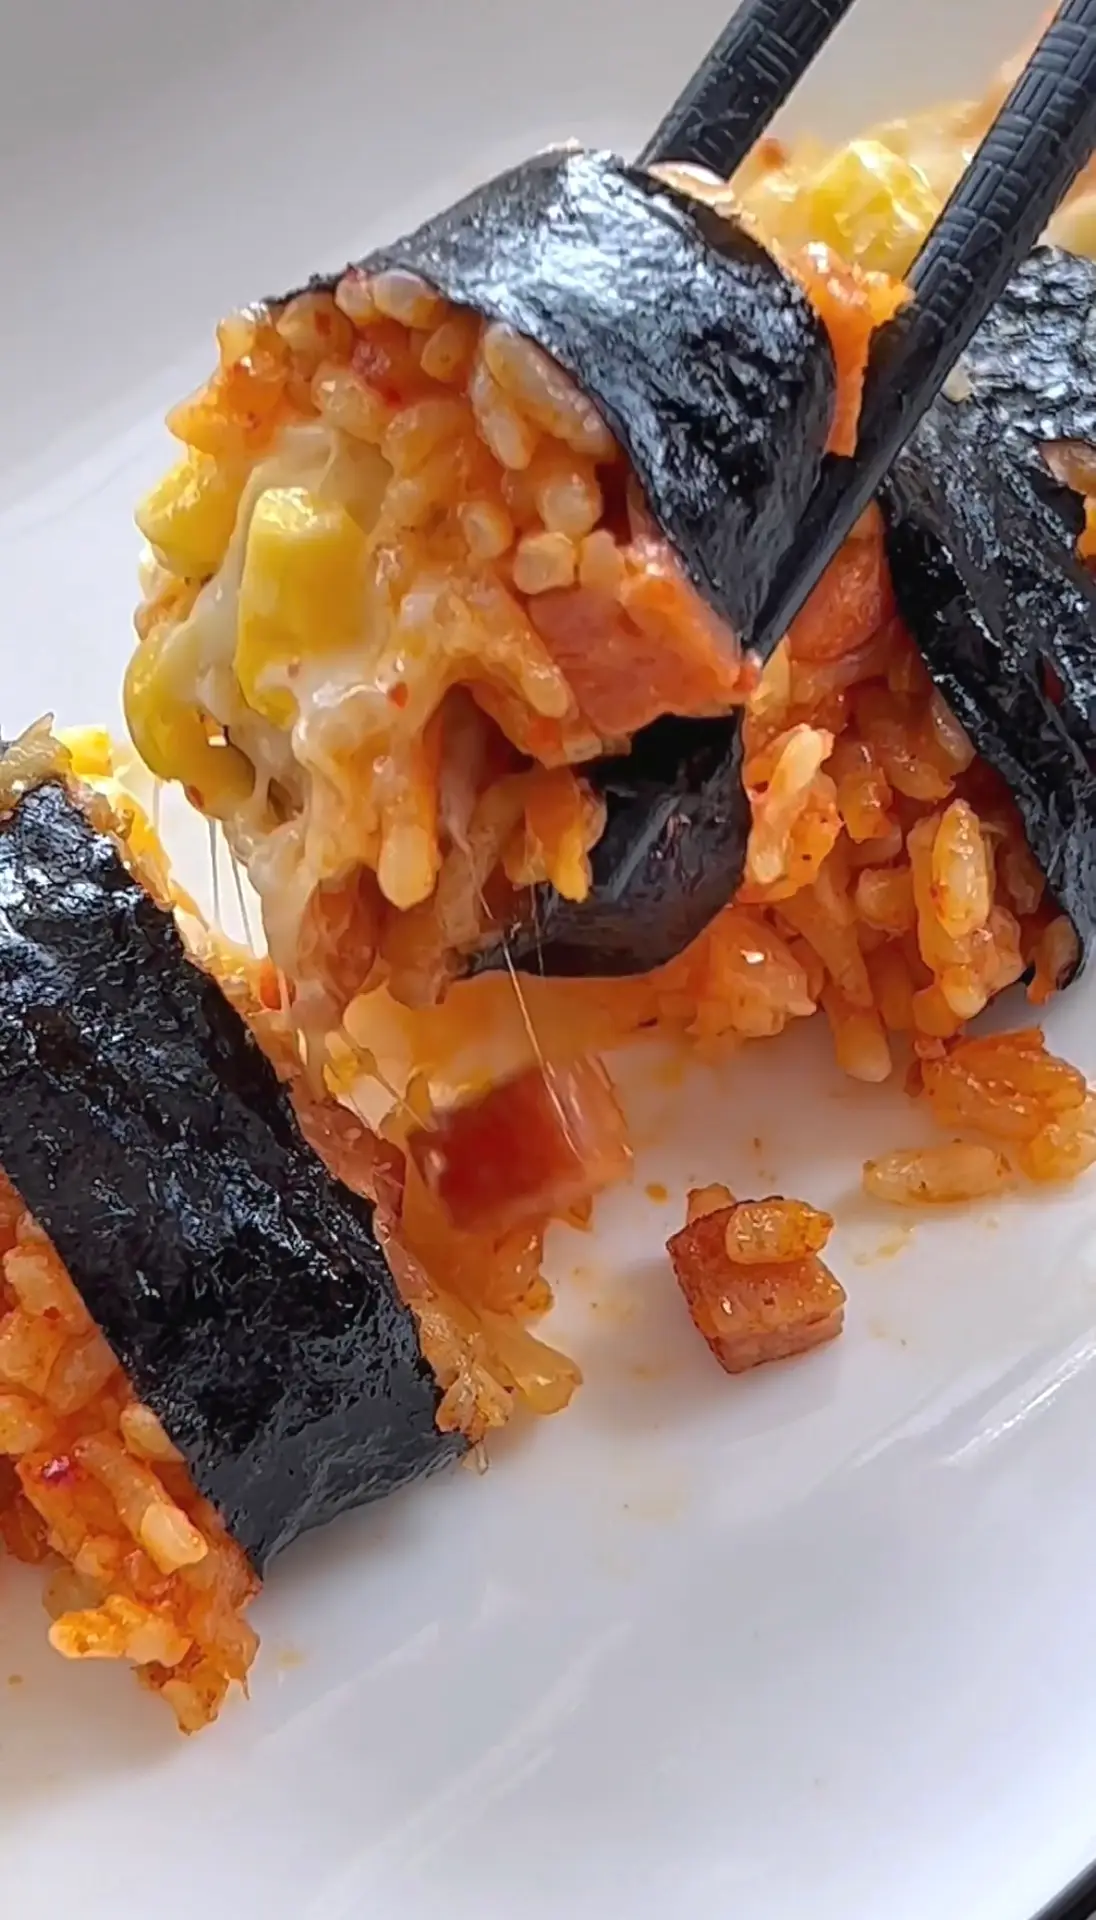
It’s everything you love about classic kimbap—rolled up in seaweed and easy to eat with your hands—but with a bold, comforting twist. Instead of plain rice, this version starts with savory kimchi fried rice studded with bits of Spam and sweet onions, then gets layered with gooey mozzarella cheese, corn, and creamy Kewpie mayo. It’s the perfect marriage of Korean and comfort food flavors.
These cheesy kimchi kimbap rolls are ideal for lazy lunches, fun weeknight dinners, or even meal prepping for the week. They’re packed with flavor, super customizable, and honestly just really fun to make. Whether you’re a longtime kimbap fan or trying it for the first time, this version brings an extra level of indulgence you didn’t know you needed.
WHY YOU’LL LOVE CHEESY KIMCHI FRIED RICE KIMBAP
•Easy to make with pantry staples
•Perfectly portable – great for on-the-go lunches or sharing
•Customizable – swap out the protein or make it vegetarian
•Warm & melty – the mozzarella and mayo mixture takes it over the top!
INGREDIENTS FOR CHEESY KIMCHI FRIED RICE KIMBAP
•1 tbsp sesame oil (or neutral cooking oil)
•1 medium red onion, diced
•1/2 cup spam, diced
•1/2 cup kimchi, chopped with juice
•1 1/2 cups cooked white rice
•3 sheets of roasted seaweed (nori)
•1/2 cup canned corn
•1 cup shredded mozzarella cheese
•3 tbsp Kewpie mayo
•1 1/2 tbsp gochujang
•1 tbsp soy sauce
•1/2 tsp sugar
•Optional: sushi mat for rolling
HOW TO MAKE CHEESY KIMCHI FRIED RICE KIMBAP
Step 1: Make the Kimchi Fried Rice
In a skillet, sauté diced onion in oil until softened. Add spam and cook briefly, then stir in kimchi. Add cooked rice, gochujang, soy sauce, and sugar, mixing well to coat.
Step 2: Prepare the Cheese Filling
In a microwave-safe bowl, combine corn, mozzarella cheese, and mayo. Microwave until melted, about 1–2 minutes, and stir to combine.
Step 3: Assemble & Roll
Lay a nori sheet (rough side up) on a sushi mat. Spread about ¾ to 1 cup of kimchi fried rice evenly on the bottom ¾ of the sheet. Spoon the cheese mixture across the center, then roll tightly from the bottom up. Repeat with the remaining ingredients.
Step 4: Slice & Serve
Cut each roll into bite-sized rounds. Serve warm for the ultimate cheesy experience!
SERVING SUGGESTIONS FOR CHEESY KIMCHI FRIED RICE KIMBAP
These cheesy kimchi fried rice kimbap rolls are best enjoyed warm, but they’re just as tasty at room temperature. Pack them in a lunchbox, serve as a game day snack, or pair with miso soup and a cucumber salad for a full meal.
For added garnish, try:
• Toasted sesame seeds
• Thinly sliced green onions
• A drizzle of extra Kewpie mayo
INGREDIENT SUBSTITUTIONS
• Spam: Swap for cooked bacon, sausage, tofu, or mushrooms for a vegetarian option.
• Mozzarella: Any mild melting cheese works—try cheddar or Monterey Jack.
• Kewpie Mayo: Use regular mayo and add a small squeeze of rice vinegar or a pinch of sugar for similar flavor.
• White Rice: Leftover rice is best! You can use short or medium grain.
STORAGE & REHEATING TIPS
Kimbap is best enjoyed fresh, but you can store leftovers in the fridge for up to 2 days.
To reheat:
Place a few slices in a nonstick skillet over medium heat and toast each side gently to re-crisp the nori and melt the cheese inside. Or microwave in short bursts, though the texture won’t be quite the same.
TIPS FOR SUCCESS
• Use cold rice to avoid mushy texture.
• Flatten the rice evenly across the nori sheet for easy rolling.
• Don’t overfill – too much filling makes it harder to roll.
• Use plastic gloves or lightly oiled hands to handle sticky rice.
FREQUENTLY ASKED QUESTIONS (FAQ)
Can I make cheesy kimchi fried rice kimbap without a sushi mat?
Yes! You can roll directly on a clean flat surface—just take your time to roll tightly.
Can I make it ahead of time?
You can prep the fried rice and cheese mixture ahead of time, then assemble and roll just before eating for best texture.
Is this spicy?
It has a mild kick from the gochujang and kimchi, but you can adjust the amount to your taste.

Cheesy Kimchi Fried Rice Kimbap
Equipment
- Sushi Rolling Mat
Ingredients
- 1 tbsp sesame oil - or regular oil
- 1 medium red onion - diced
- 1/2 cup spam - diced
- 1/2 cup kimchi with some juice - cut into bite-sized pieces
- 1 1/2 cup cooked rice
- 3 Sheets Nori
- 1/2 cup canned corn
- 1 cup shredded mozzarella cheese
- 3 tbsp kewpie mayo
- 1 1/2 tbsp Gochujang
- 1 tbsp soy sauce
- 1/2 tsp sugar
- Sushi mat
Instructions
- Make Kimchi Fried Rice: In a non-stick pan or skillet, heat 1 tablespoon of sesame oil or regular oil over medium heat. Add diced onions and cook for about 3-4 minutes until they are soft. Stir Occasionally.
- Add spam and cook for about 1 minute, then add in the kimchi and cook for another 30 seconds to bring out the flavors.
- Add in the rice and Gochujang, stir to mix until everything is well combined. Remove from heat and set aside.
- Assemble the Kimbap: lay a sheet of nori rough side up on a sushi mat or a clean flat surface if you prefer to not use a sushi mat. Evenly spread 3/4 - 1 cup of kimchi fried rice over the nori sheet, covering the bottom 3/4 of the nori, leaving the top 1.5 inch uncovered. Press down on the rice with your fingers or the back of a spoon to ensure it’s flattened evenly.
- Add corn, cheese, and mayo into a microwave-safe bowl. Mix well, then microwave for 1-2 minutes until cheese has completely melted.
- Pour 1/3 of the cheese mixture evenly across the top.
- Tightly roll the kimbap from the bottom end all the way to the top.
- Repeat step 4, 5, & 6 two more times with the remaining nori sheets.
- Evenly cut each kimbap into bite-sized pieces. Serve right away & enjoy!